Calendar Overview
Use this screen to get an overview of the added calendars. The overview screen is available in the Calendar Overview menu item of the Calendar menu.
Note
There are no calendars added by default. Please contact your administrator to add one ore more calendars.

No Calendars Found
This overview works the same like usual calendars. Different time periods and timelines can be selected to view appointments, and it is possible to jump between different periods.
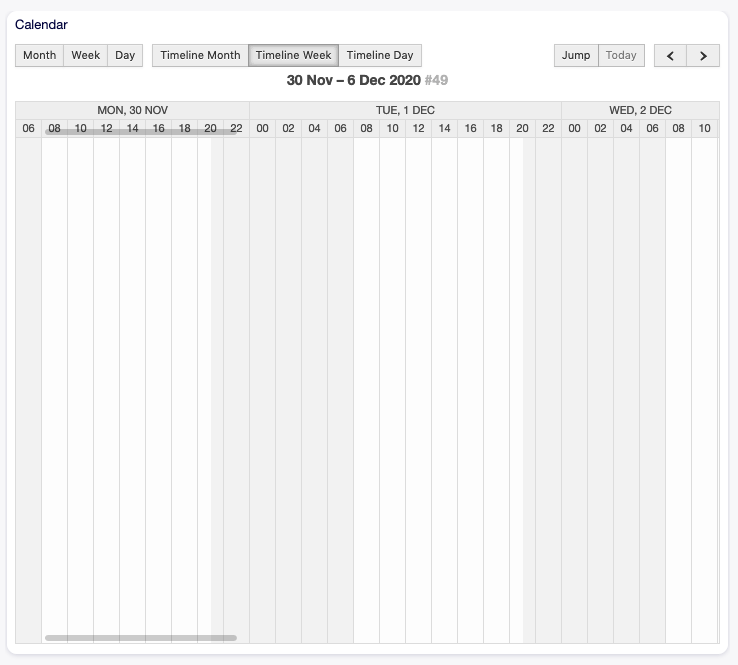
Calendar Overview Screen
Check or uncheck the checkboxes in the Calendars widget to show or hide appointments in a specific calendar.

Calendars Widget
To view appointments in external calendar applications:
- Click on the Copy public calendar URL icon in the last column of Calendars widget to copy the URL to clipboard.
- Open your external calendar application.
- Insert the URL into your external calendar application.
Note
If several calendars are added to the system, use the filter box to find a particular calendar by just typing the name to filter.
Within the calendar overview, an agent is able to display, create, edit and/or delete appointments of different calendars, depending on their permission level to the related calendars. Such appointments can be created or edited via drag and drop within this screen.
To add a new appointment:
- Click on the Add Appointment button in the left sidebar.
- Fill in the required fields.
- Click on the Save button.
See also
The Appointment dialog is explained in New Appointment chapter.
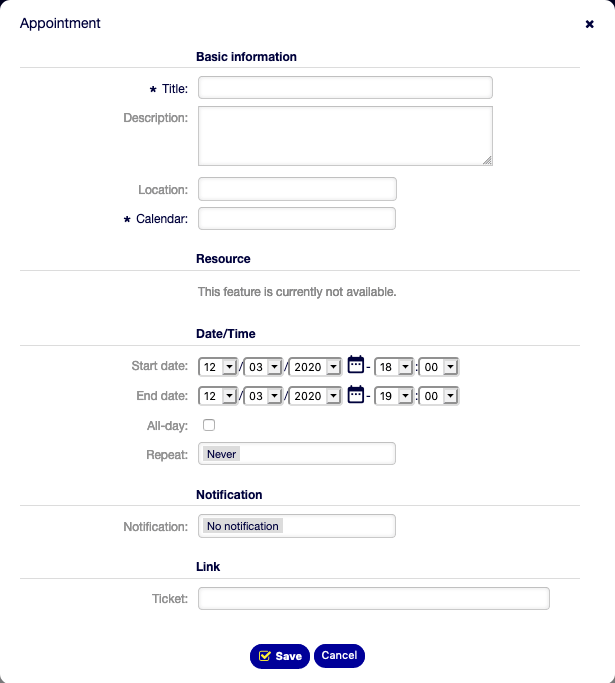
Appointment Dialog
To edit an appointment:
- Click on an appointment in the calendar overview.
- Modify the fields.
- Click on the Save button.
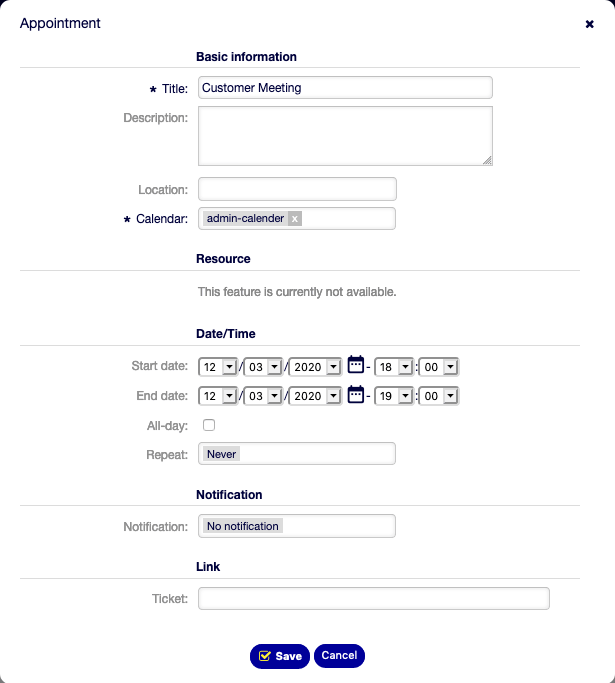
Edit Appointment Dialog
To copy an appointment:
- Click on an appointment in the calendar overview.
- Click on the Copy button.
To delete an appointment:
- Click on an appointment in the calendar overview.
- Click on the Delete button.
- Click on the OK button in the confirmation dialog.